‘Your first?’ regular readers of my blog will ask in a surprised fashion – yes! While I regularly completely disassemble, clean and polish pens, I only bought the parts to repair some three days ago. Once the sacs and shellac that I needed had arrived (yesterday, as Vintage Pen Parts were startlingly efficient) I immediately set to work restoring a ring-top Parker Duofold, a Wahl-Eversharp desk pen and a Sheaffer Balance Lifetime to full working condition.

I had read countless articles about how to do this. It is not impossible. I decided to believe I could do this.
Lever-fills, I knew from research, are the simplest ones to fix. Just take the sac, cut it to the correct size, and allow to dry. Taking this into consideration, I started with the lever-fill Sheaffer.
My only fault when affixing the new sac was an overabundance of caution. I was afraid of making the sac too short. Also, the Sheaffer has a tapered barrel, so you can’t just line up the sac with the end of the base; the taper means the last centimetre or two is too thin to allow it enough room.
As such, after trimming, the sac Would Not Fit.
I resorted to cutting it down two millimetres at a time until it did.
My lofty goal having been attained, I applied a thin layer of orange shellac to the mounting peg, before sliding the sac over it. I wiped off excess shellac, and left it to cure for half an hour. I then set to work on the not-so-easy ring-top Parker.
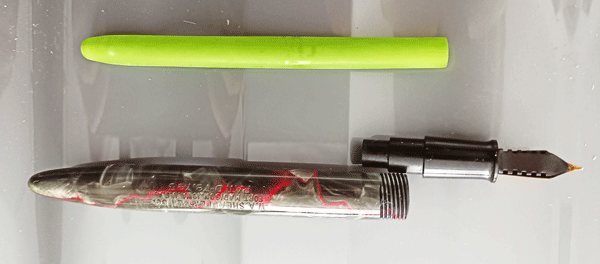
It’s a button-filler.
Many a novice pen restorer has been defeated by this infuriatingly tricky filling mechanism. You must attach the sac, slide in the section, and then from the other end, poke the pressure bar into place without puncturing the sac.
Basically the pen repair equivalent of trying to perform a backflip on a tightrope, for a beginner.
First step, simple. I managed to cut the right amount off the sac this time, then I used the shellac to attach it to the correct part of the section.

After letting it, like the Sheaffer, cure and harden for half an hour, I set Stage Two of the operation in motion. To give myself some confidence, I started on the simple Sheaffer.
After the application of some silicone grease to help the section slide into the barrel easily, I pushed the whole thing into its original place in one gentle but firm motion.
I lifted the lever. It felt springy insead of loose, and it didn’t say ‘crunch’ like it did the first time I tried to fill it and found out there was a mess of perished rubber inside. Only one true test though. I gingerly filled it with Black Pineider ink, then wrote my name.
IT WORKED. I had actually fully restored a pen! Without any of the common newbie mistakes such as cracking the barrel, warping the barrel, setting the barrel on fire, or bringing any other miscellaneous misfortune upon the unfortunate writing instrument.
Encouraging to be sure, but I still had the button-filler to go, and this one is special to me. You are meant to begin restoring cheap pens at first, but I didn’t have any to practice on. I only have very nice ones in near mint condition. This leaves no room for error when I’m trying to fix them, as I would never forgive myself for ruining a pen so old when it could easily last into the next century.
To help myself, I broke the repair into smaller, more manageable steps.
- Remove blind cap and button. Done.
- Insert nib unit with new sac attached. Successful.
- Insert pressure bar, without puncturing the ink sac. Fiddly, but I did it!
- Re-attach button. Easily done, a quick push got it back into its usual place.
- Press button. If steps one to four were done properly, the button will pop back up. It did!
Before getting started on the desk pen, I needed to see if my latest repair had worked, so I filled the Parker with the same black Pineider ink I used in the Sheaffer. The moment of truth.

At last! The nib is in good condition and writes beautifully, too.
The desk pen was easily fixed in the same manner as the Sheaffer, and it too functions perfectly now.

Maybe I just had luck on my side, but I found these repairs quite easy, if a bit scary, and if I can do it anybody who can handle small pen parts can. You might be best to avoid practising on a family heirloom, but pick up a few cheap pens and give it a try.
Reviews of these pens will soon be published on my blog, KraftyCats, and I hope you enjoyed reading about my first pen restoration. Thank you to Deb for allowing me to guest post on her wonderful blog again!

Chloé Stott is a blogger, freelance writer and product reviewer with a fountain pen obsession. She is the founder of KraftyCats, where she blogs about pen restorations, guitars, cats and coffee, and publishes reviews for companies all over the world.

Well done, Chloe, and good luck for your endeavours. Let’s hope future jobs are just as rewarding.
Thank you, Michael!
Bravo Chloé, and thanks so much for helping to keep vintage fountain pens alive.
>
More people should learn to repair them so more can last for future generations to enjoy using them! They are works of art, and good tools too 🙂