Tools: The Inner Cap Puller.

Most people wouldn’t even consider a pen with a broken clip. Even when it’s otherwise fine, that’s such a serious fault that the pen ceases to be an object of desire. If it has a washer clip and you can find a replacement, the job’s pretty straightforward and the pen goes from junk to jewel in a matter of minutes. If it’s one of the several types of inserted clip that penetrates the body of the cap, it’s quite another matter. Some Swan clips are heat-inserted straight into the plastic. They can be removed and replaced without special tools – other than a heat source – but it takes time and care and success is not guaranteed. Worse still are those that are held or covered by the inner cap, because you have to get the inner cap out of there, and that can be very tricky. Help is at hand, however, in the shape of the Inner Cap Puller:

Most pen repair tools can be picked up in any hardware store but there are one or two that are specialist, and this is one of them. As there is a low volume of sales and it’s a high-precision tool, it doesn’t exactly come cheap, but a few repairs that otherwise couldn’t have been done will pay for it. There are a couple of versions out there. Mine came from Tryphon Enterprises, who sell a wide range of pen repair tools and consumables and are very helpful and obliging people to deal with.

Even with the puller, removing an inner cap isn’t a trivial business. It was doubtless mechanically pressed into the cap, it’s been in there a long time and it will be encrusted with decades of ink. All that adds up to a great reluctance to come out. Removal needs extended and perhaps repeated soaking, heat and a lot of care and patience. A pen cap is a very fragile thing and the force that a puller can bring to bear is considerable. Breaking a good cap will really spoil your day.

Inner caps themselves are generally not interesting, being just short cylinders of plastic. They’re useful, though, in that they provide the means by which screw caps close securely, they may hold or protect the clip and they reinforce the cap. Sometimes, especially in Watermans, they’re made from sections of scrapped pen barrels, and you may be surprised to fined a marbled-pattern inner cap hidden away inside your pen.

Inserted-clip repairs can be among the most difficult restoration tasks, but successfully done, it brings a pen back from a fate as a spares donor to one that someone will be proud to own, and that’s very satisfying.
Tools: Sac Fitting.

Most sacs can be slipped on only using your fingers, without any other assistance, but there are some awkward sections where you need a bit of help – necked sacs, for instance, or where the section protrudes a long way, or when there’s a breather tube.

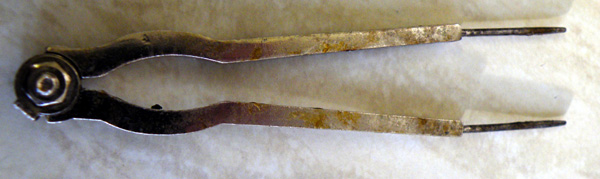
When I began repairing pens (it was quite a while ago!) there were no specialist sellers of tools for the fountain pen repair-person. Then, you adapted tools made for other purposes – still a good solution for pen repairing. I found a pair of dividers in an old geometry set, snapped the points off and filed the rough edges away so they wouldn’t tear the sacs. It worked very well and I used nothing else for many years.

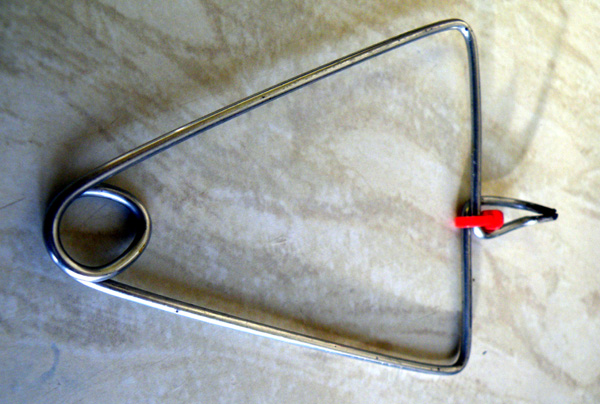
More recently, I bought this handy gadget:

Actually, it’s more clumsy in use than my dividers, but there are occasions where the wider sac opening it gives can be useful, like when an especially thick section protrudes well beyond the nipple.

Tools: The Knock-Out Block.

Pen restorers have a tools problem in the way others might have a drinking problem or a heroin problem, and sometimes family interventions become necessary as the furtively-purchased tools continue to multiply. You can never have enough pliers, for instance, or angled dental probes. Faced with the array of tools on display in a hardware store, most restorers could find a use for them all. Every one.

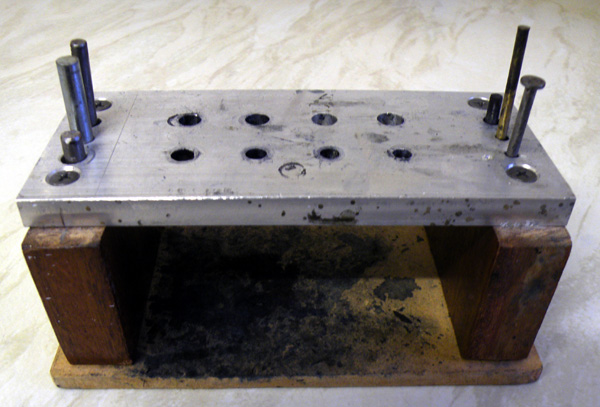
There are some standbys that are unique to the pen mechanic, though, and the knock-out block is one of them. Over the years I’ve had three. The first one was a simple wood block with a metal top and various sizes of holes drilled through. It worked but it wasn’t very stable. I then got one of the cylindrical metal type. Better, but still not what I wanted – it was too small and fussy. Then an older restorer retired from the craft and sold off a mountain of tools and spares which I managed to snag. Among them was this knock-out block:

It’s stable, roomy and holds a range of punches at the sides. It has good open clearance underneath to let the nib and feed drop clear. Perfect!

At least two-thirds of my pens never touch the knock-out block, though. Some restorers will proudly tell you that they totally disassemble all the pens that they repair but that’s not my way. Fitting a nib and feed accurately is no trivial matter. Unless it’s essential it’s better not to have to do it. After all, despite their age, most old pens have retained their original factory settings. If the nib and feed are in good order and well aligned, it’s best to leave them alone. Flushing them with a lot of water clears dried-ink blockages and ensures good future ink flow. On those rare occasions when that’s not enough, or when the nib is damaged and needs to be worked on or replaced, or when a nib is stuck in a rotated position, that’s when the knock-out block comes into its own.